I know that feeling of finally bringing home that perfect piece for that empty spot on your wall, but hanging art can be intimidating. If not done right, you're left with a mess of holes that you're trying to cover with that perfect art piece that just doesn't seem so perfect anymore. It’s ok… we’ve all been there…. But fret no more! We've put together some of our favourite easy hanging tips to help you get your wall decor looking just right.
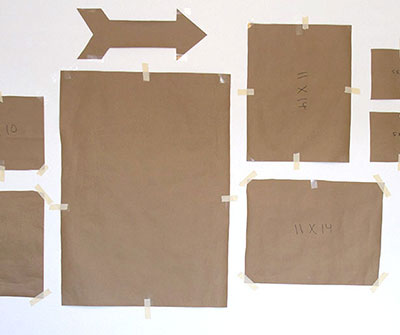
One of the simplest things you can do is make templates of the pieces you want to hang on the wall out of paper. Simply lay your art out on the floor as you'd like to see it hung on the wall. Trace your pieces to size on the paper, cut out and then tape the paper templates to the wall. (Make sure to indicate you arts’ nail locations on your newly made templates.) Hammer the nails based on the marks you made on the templates. Rip the paper away and hang your art!
busymommymedia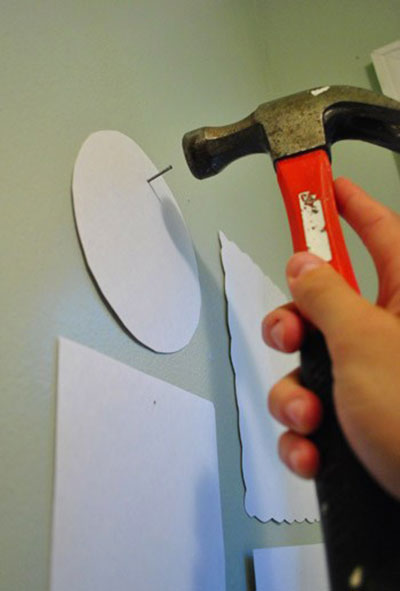
younghouselove
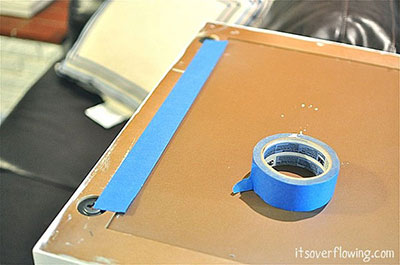
Don’t have enough paper to create templates for the perfect gallery display? No worries. Another great tip is to place a strip of painters tape along a level. Hold the level up to your picture and on the tape mark the location of your nail holes. Then transfer to your wall. This will ensure a straight finish each time.

familyhandyman
Should you have two holes on your picture frame, you can also decide to extend the tape from one hole to the next, measuring the distance in between. Take your tape, place it up on the wall and then use a level to ensure it’s straight. Hammer the nails in place based on the length of the tape.
itsoverflowing
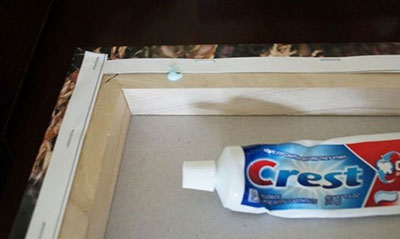
We all have this next picture-hanging secret - toothpaste! Yup-toothpaste! Add a small drop of toothpaste to the back of your picture where the nail would go. Then press against the wall so that the toothpaste transfers to where you’d like the nail placed for your ideal hanging position.
somewhatsimple
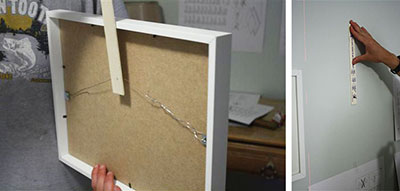
A paint stick is another household item that can be used to help you hang those pieces with wire backings if you don't have the actual tools used in the trade. To create this easy DIY tool, place a nail or small screw at the end of your stick. Hang the picture wire on the screw and then place the whole thing against the wall where you’d like the picture to hang. Remove the picture keeping your stick in place against the wall. Press the screw to the wall to make a mark and then remove. Now you know exactly where the nail should be hammered.
viewalongtheway
Now that you have everything hung, keeping it straight and in place is the next challenge. A neat little tip is to place a small Velcro patch or even a drop of tacky putty at the bottom of your frame to keep it from moving.
Have fun and get hanging!
0 Comments
Leave a Reply. |

|
|
Quick links
HOME
|
©2024 LE FRAME SHOPPE