LE FRAME SHOPPE
  • Home
  • Services
  • Gifts
  • Contact
  • Blog
  • Français
  • Home
  • Services
  • Gifts
  • Contact
  • Blog
  • Français
Search

DIY DRY ERASE CALENDAR

1/15/2018

2 Comments

 
Le Frame Shoppe | DIY dry erase calendar
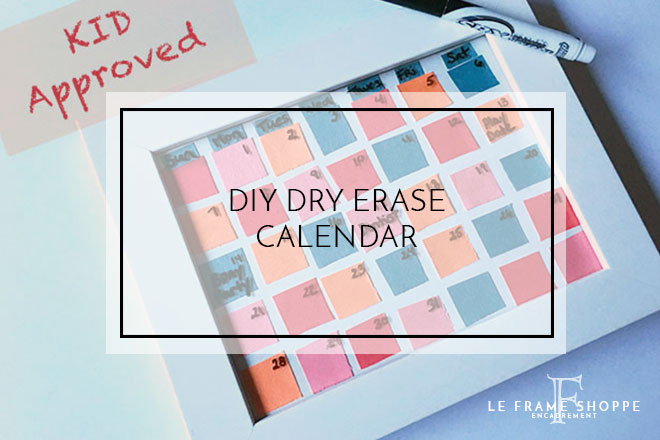
​When it's this cold outside I like to curl up with the kids and get crafty and with the start of the new year why not have them create their very own calendar. 
I was inspired by Pretties For Pennies’ beautiful version of a DIY dry erase calendar using paint chip samples. With no paint chip samples on hand, we cut up pieces of construction paper instead. You can really use whatever you like so get creative!​

Here’s what you’ll need for our construction paper version:
 
-Frame, with inside glass and tabs on back
-Mat board (these can be bought from your local frame shop) or thick board, sized to fit inside the frame
-Construction paper, color of choice
-Scissors
-Glue stick
Le Frame Shoppe | DIY dry erase calendar
  1. Cut 35 squares out of the construction paper to form 7 rows of 5 squares for the days and weeks in each month. The size of the squares will depend on how big your frame is. We stacked the paper to reduce cut time and then eyeballed how big the squares should be. We also cut 7 small rectangles to top the rows to label the days of the week.

    NOTE: Because I wanted the kids involved, little hands cut our squares so the sizes and edges are not as even as they could be. Feel free to use a ruler and adult precision!

  2. Place the rectangles at the start of your 7 rows then arrange 5 squares under each rectangle on your mat board. When you’re happy with the way they look, glue them down.

  3. Flip your frame so that it’s face down on your worktable and ensure that your glass is clean. Place your mat board with glued squares face down on the glass of your frame.

  4. Press the frame tabs down snugly over your mat board to secure it in place. Flip the frame and admire your handiwork!

  5. Now for the finishing touches. Grab a dry erase marker and over the glass, write the name of each day of the week on the rectangles, starting with Sunday and finishing with Saturday. Write the numerical days on each square according to the month. Then add in any important reminders for your little ones throughout the month.
Le Frame Shoppe | DIY dry erase calendar
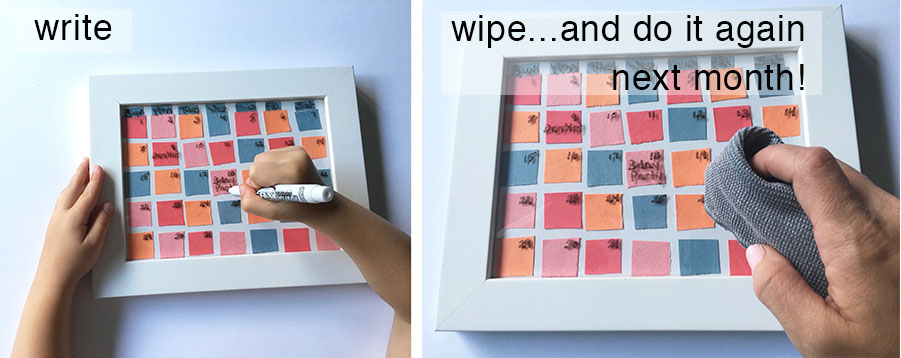
At the end of the month, wipe everything clean and fill in your calendar again! This easy calendar looks amazing, teaches your little ones about scheduling and managing their time, helps them learn the days of the week and months and can be used over and over again. LOVE! LOVE! LOVE! 
 
Tag us on Instagram @leframeshoppe with a picture of your DIY dry erase calendar! 

NEXT
POST

PREVIOUS
POST

Le Frame Shoppe Blog | Trend Alert | Color
Le Frame Shoppe Blog | 2018 Trend | Natural Element
2 Comments
Tez link
8/10/2021 06:36:04 pm

Having a dry erase board sounds awesome as I imagine it cuts down on paper use. I need to get a board for my kids when they study. I'll have to pick up some markers as well.

Reply
Le Frame Shoppe
12/13/2021 12:21:06 pm

It sure does and it combines function with aesthetic perfectly!

Reply


Leave a Reply.

Life is better framed to those who subscribe.

Quick links

Picture

HOME  
SERVICES 
BOOK AN APPOINTMENT
​
INQUIRE
GIFTS
BLOG
CONTACT

FRENCH


Stay in touch

Picture
Picture

Picture


​telephone: 514 369 2633
email: info@leframeshoppe.com 

 2146 Route Transcanadienne
 Dorval, QC
 H9P 2N4
​
442 Beaconsfield Blvd
Beaconsfield, QC 
H9W 4B9
318 Ave. Victoria
Westmount, QC
H3Z 2M8
​​​

​©2023 LE FRAME SHOPPE
  • Home
  • Services
  • Gifts
  • Contact
  • Blog
  • Français